
Connect an AI app with MCP
Scanfully has an MCP server: a way for AI apps such as Claude, ChatGPT, Cursor and VS Code to read your sites and their monitoring, and, if you allow it, make changes and start scans. You can then ask questions like “which of my sites had downtime this week?”, “which plugins have known vulnerabilities?” or “which plugins need an update?” in the app you already use.
The MCP page shows how to connect each app and which apps are connected. Open it from the account menu, or with MCP at the bottom of the main menu.
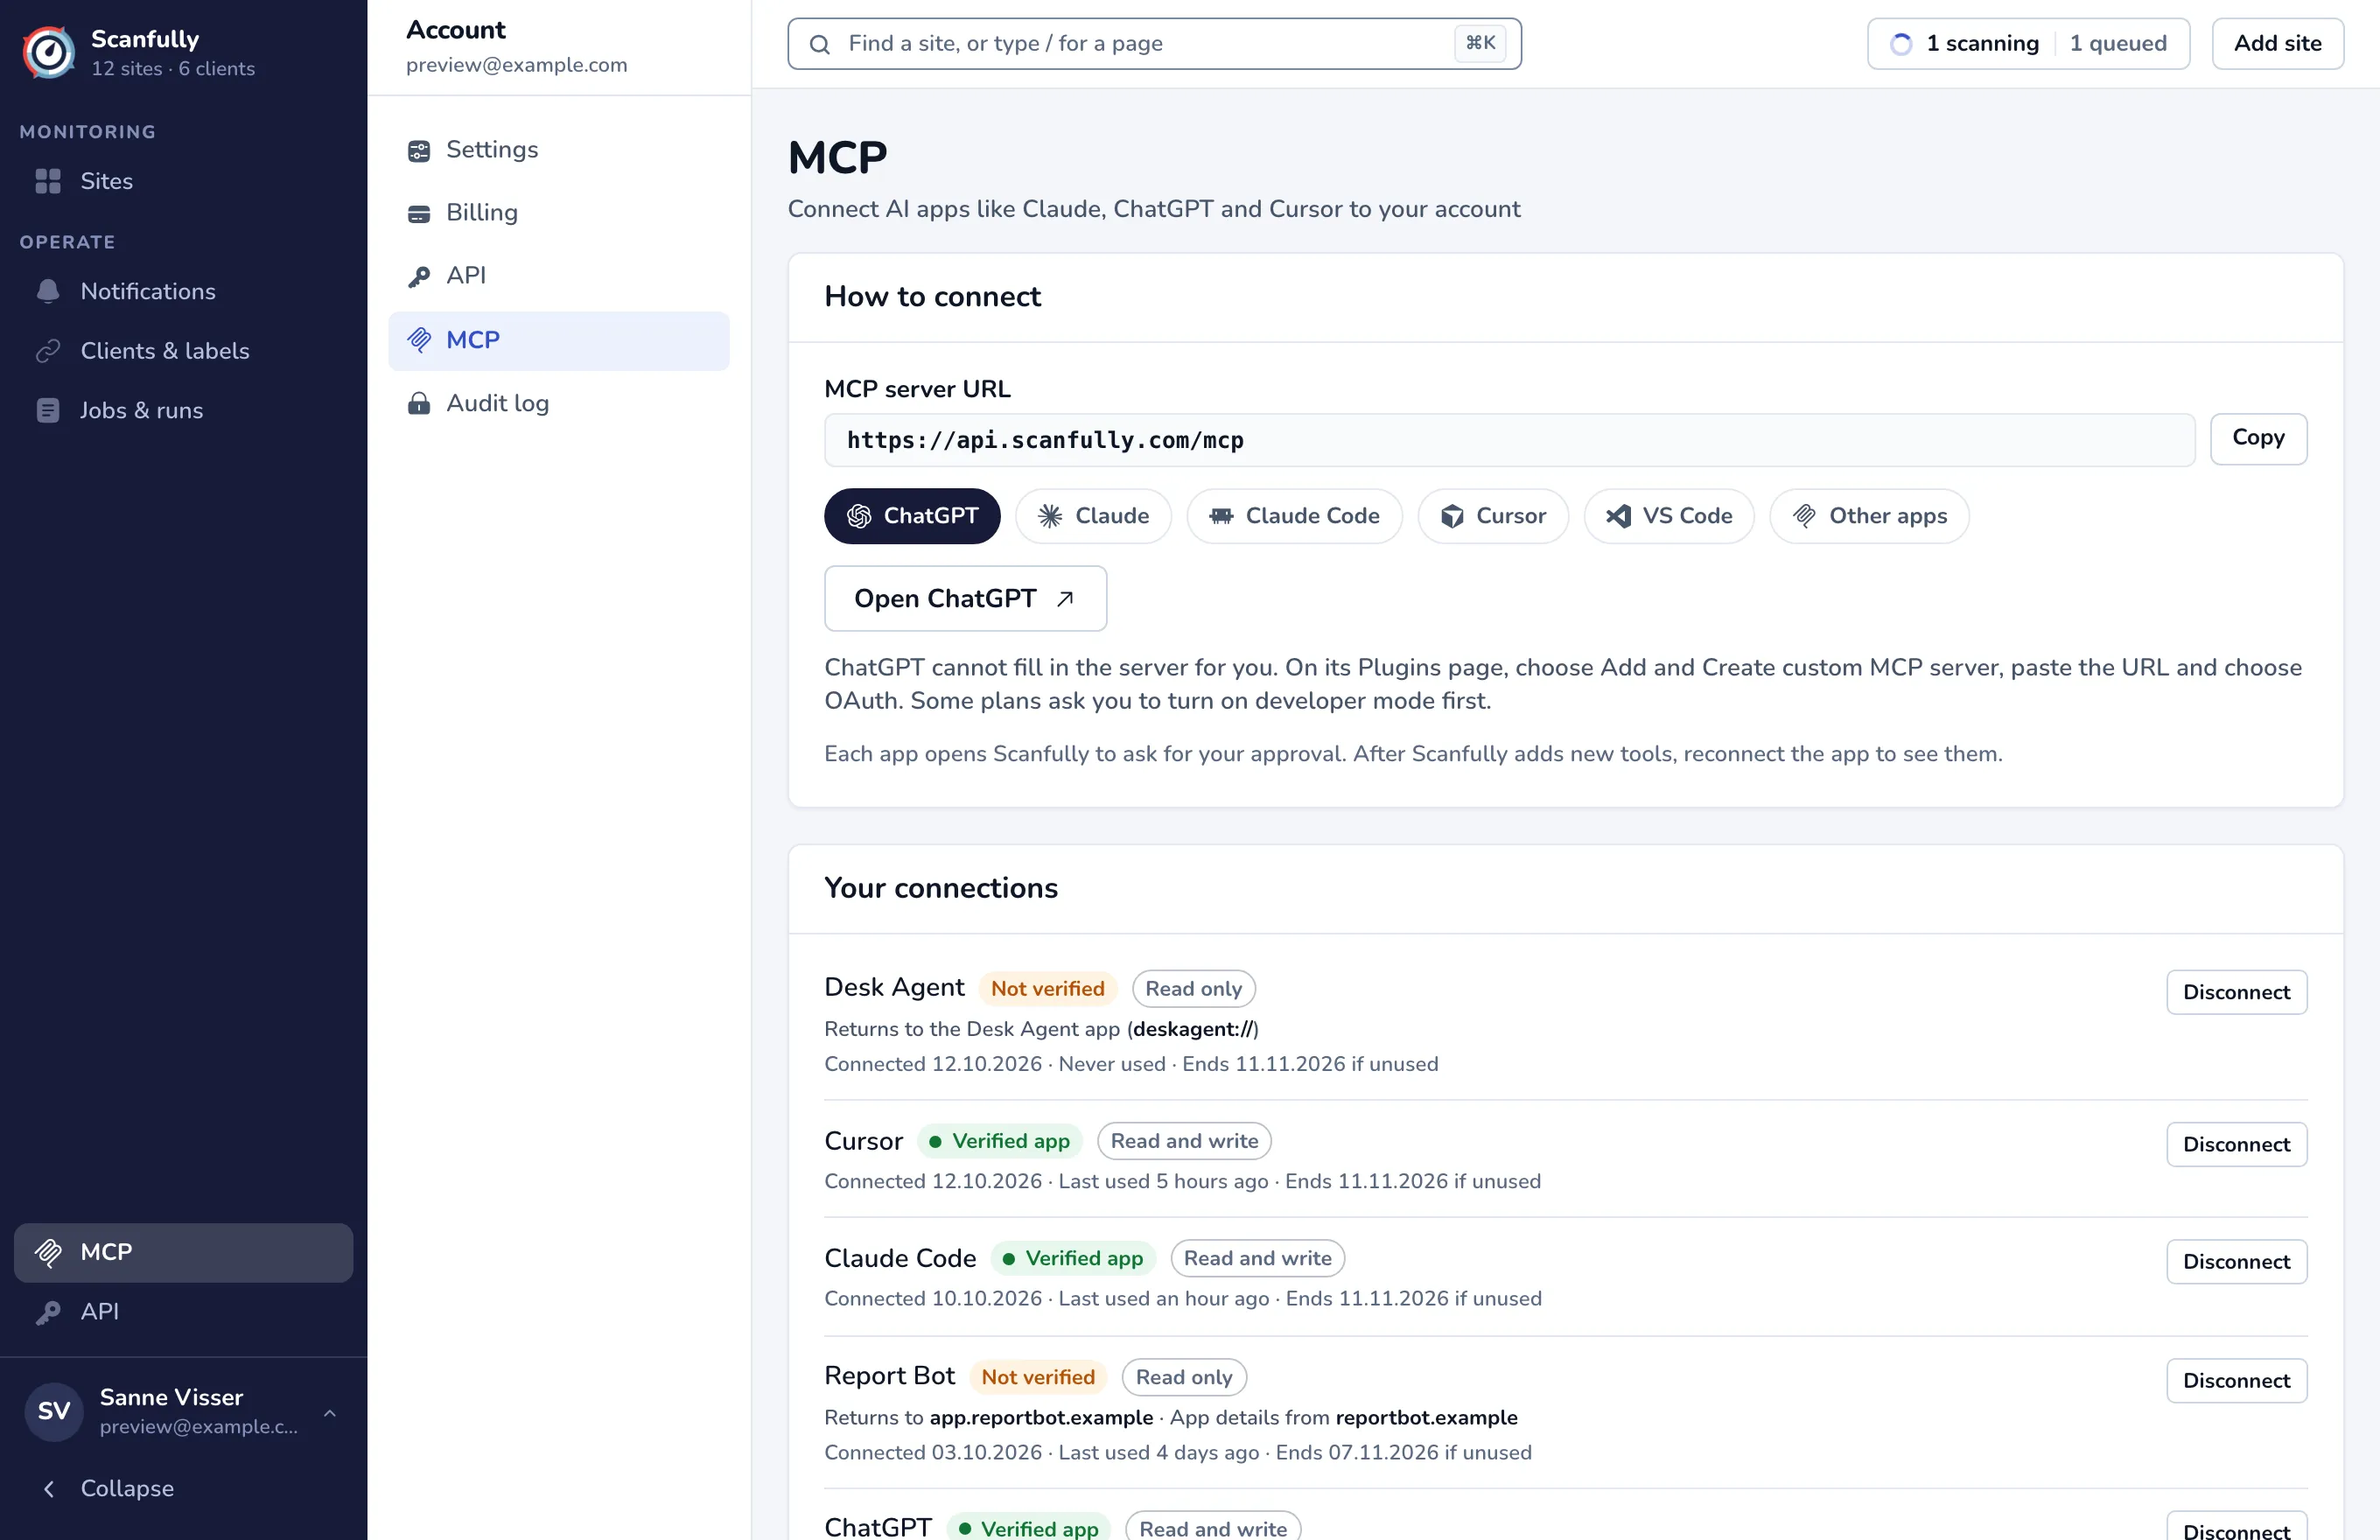
How to connect
Section titled “How to connect”The MCP server URL is https://api.scanfully.com/mcp. Click Copy to copy it. Then pick your app in the tabs:
-
ChatGPT: click Open ChatGPT. On its Plugins page, choose Add and Create custom MCP server, paste the URL and choose OAuth. Some plans ask you to turn on developer mode first.
-
Claude: click Add to Claude. Or, in claude.ai or Claude Desktop, open Connectors in the settings, choose Add custom connector and paste the URL. On Team and Enterprise plans an Owner adds it for the organization.
-
Claude Code: copy the command and run it in your terminal, then run
/mcpin Claude Code and choose Authenticate:Terminal window claude mcp add --transport http scanfully https://api.scanfully.com/mcp -
Cursor: click Add to Cursor, or add this to
~/.cursor/mcp.json:{"mcpServers": {"scanfully": {"url": "https://api.scanfully.com/mcp"}}} -
VS Code: click Add to VS Code, or run
MCP: Add Serverfrom the command palette, choose HTTP and paste the URL. -
Other apps: add an MCP server with the URL. It signs in through Scanfully.
Each app then opens Scanfully in your browser to ask for your approval.
Approve the connection
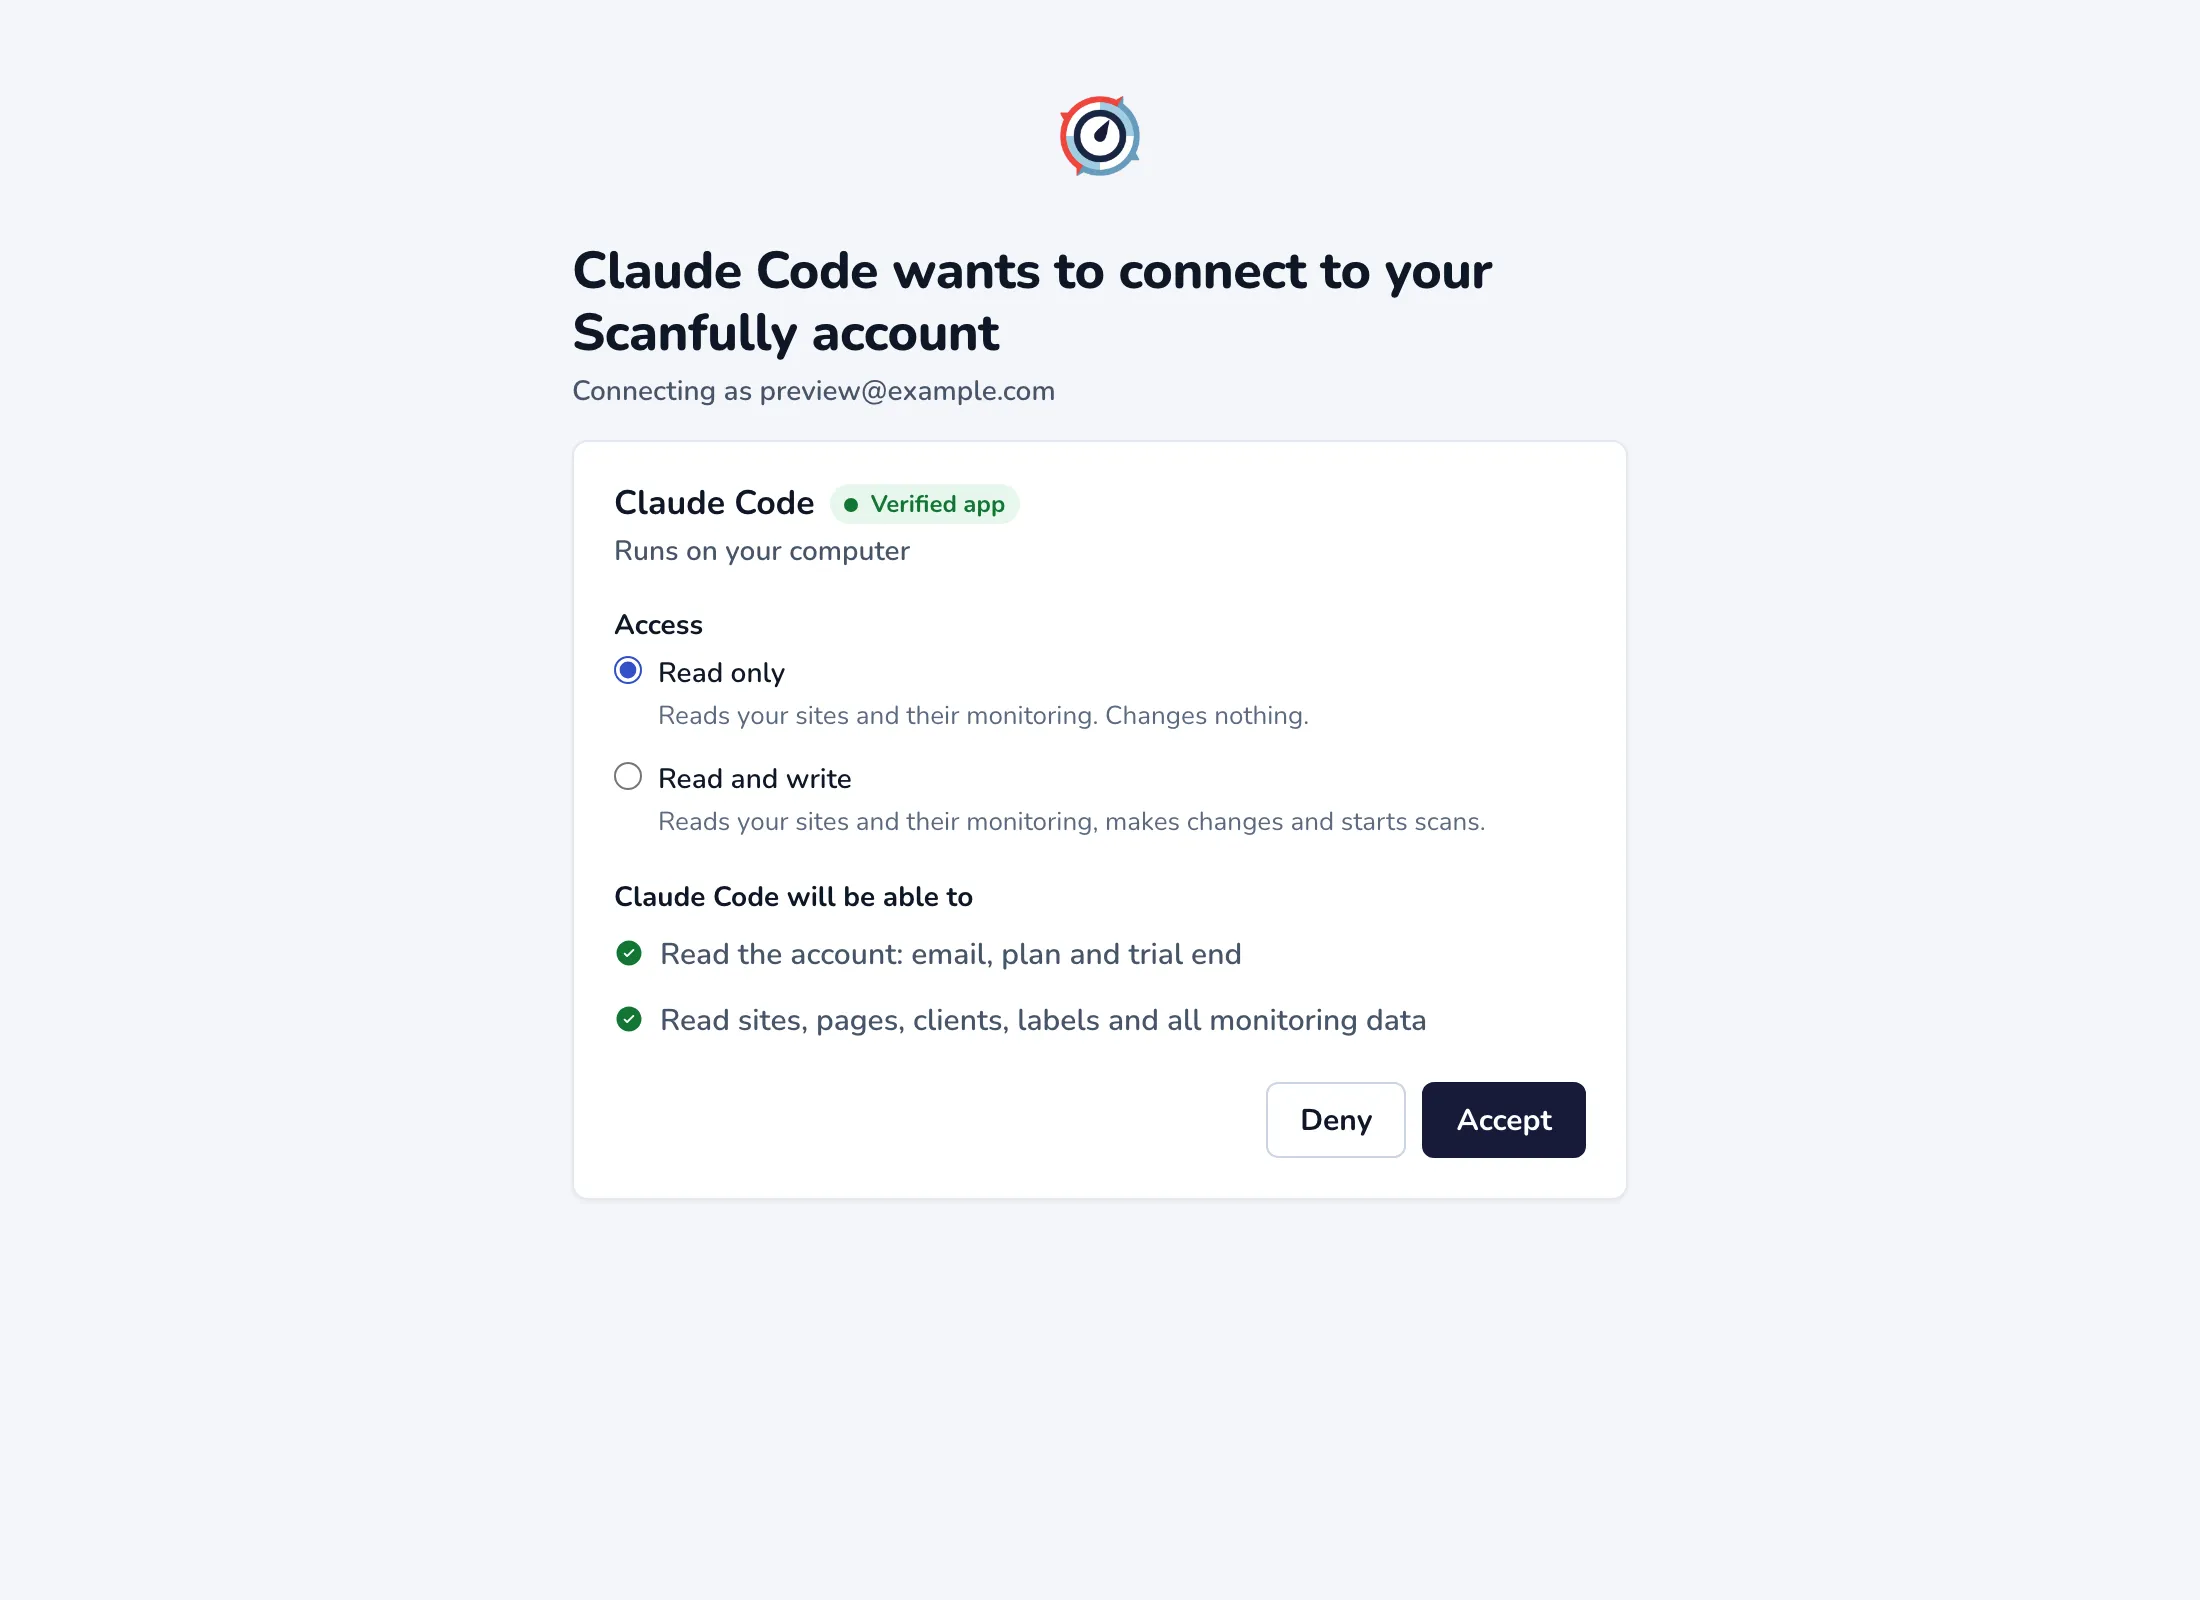
Section titled “Approve the connection”When an app connects, Scanfully shows a page that says, for example, Claude Code wants to connect to your Scanfully account, with the account it connects as. Sign in first if you are not signed in.
-
Check who is asking. A Verified app is one Scanfully knows, such as Claude, ChatGPT, VS Code or Cursor. Under the name you see where the connection goes: Runs on your computer, Returns to a web address, or Returns to the … app.
-
Choose the Access:
- Read only (preselected): reads your sites and their monitoring, and changes nothing.
- Read and write: also makes changes and starts scans.
Under … will be able to, the page lists exactly what the app may do.
-
Click Accept, or Deny to refuse. Accept becomes available a moment after the page appears.
-
Go back to the app to finish connecting. If it did not open by itself, use the Return to … link once.
A connection request is valid for 30 minutes. If it has expired, was already answered (for example in another tab) or cannot be found, the page says so: go back to your app and connect again.
Scanfully sends a security email to your account address whenever an app is connected.
Your connections
Section titled “Your connections”Your connections lists the connected apps, newest first. Each shows Verified app or Not verified, its access (Read only or Read and write), when it was connected, when it was last used, and the date it ends if it is not used before then. A connection that is not used for 30 days ends by itself; connect the app again to use it.
An account can have 50 connected apps.
Disconnect an app
Section titled “Disconnect an app”- Click Disconnect next to the app.
- Confirm with Disconnect app.
The app loses access to your account at once. To use it again, connect it again from the app.
Change the access of an app
Section titled “Change the access of an app”The access is set when you approve the connection. To change it, disconnect the app and connect it again, then choose the other access level.