
Add a site
The Add a site screen offers the two ways to get a site into Scanfully side by side. Open it with Add site on the Sites list or in the bar at the top of every screen.
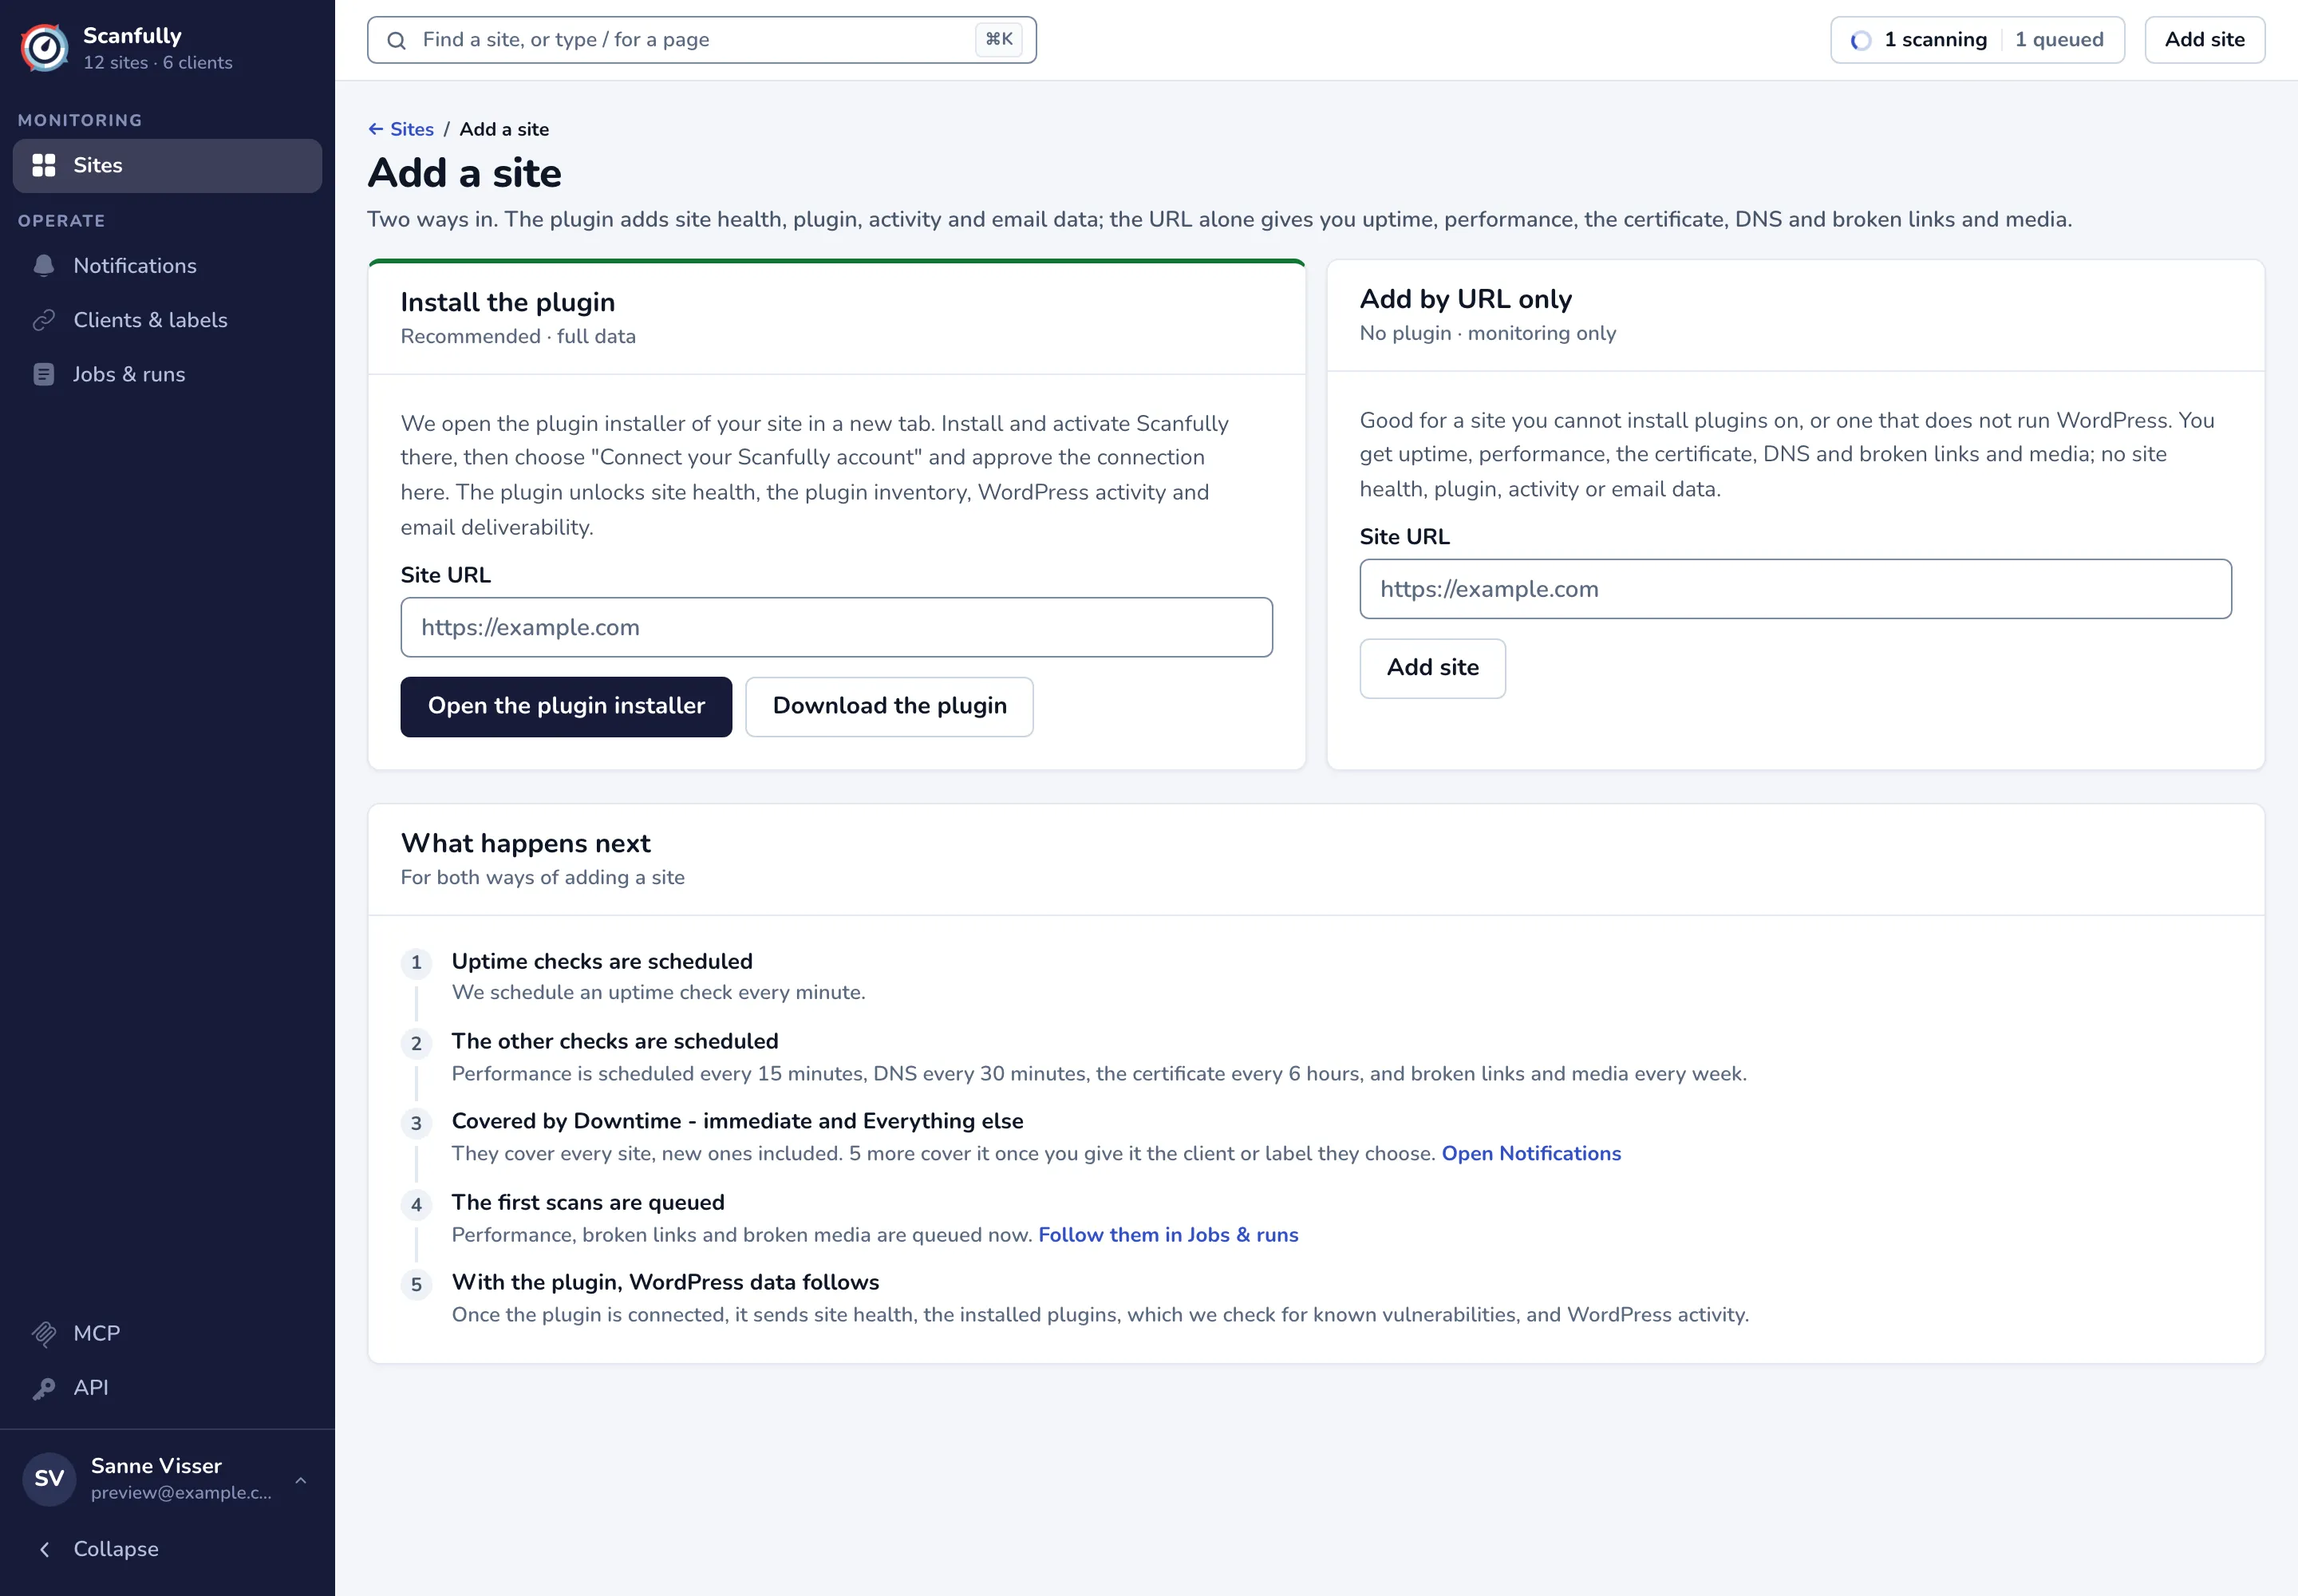
Which way to choose
Section titled “Which way to choose”| Install the plugin | Add by URL only | |
|---|---|---|
| Uptime, performance, certificate, DNS | Yes | Yes |
| Broken links and broken media | Yes | Yes |
| Site health, plugin inventory and known vulnerabilities | Yes | No |
| WordPress activity | Yes | No |
| Email deliverability | Yes | No |
| Works for sites without WordPress | No | Yes |
Choose Install the plugin for a WordPress site whenever you can. You can still install the plugin later on a site you added by URL: connect it to the existing site as described in Connect your website to Scanfully.
Install the plugin
Section titled “Install the plugin”- Under Install the plugin, enter the address of your site in Site URL, for example
example.comorhttps://example.com. - Click Open the plugin installer. Scanfully opens the plugin installer of your WordPress site in a new tab, already searching for Scanfully. Log in to WordPress if it asks.
- Install and activate the Scanfully plugin.
- Open the plugin’s settings page: click Finish setting up Scanfully in the Welcome to Scanfully! notice, or go to Settings > Scanfully. Click Connect your Scanfully account.
- Back in Scanfully, check the site and click Approve the connection.
The site appears in your list once you approve the connection. Step 5 is described in detail in Connect your website to Scanfully.
If the installer did not open, use Open it again below the button. To install the plugin by uploading it instead, click Download the plugin for the latest version from the WordPress plugin directory and upload it under Plugins > Add New Plugin > Upload Plugin in WordPress.
Add by URL only
Section titled “Add by URL only”- Under Add by URL only, enter the address of your site in Site URL. Without
http://orhttps://, Scanfully useshttps://. - Click Add site.
Scanfully adds the site, queues its first scans and takes you back to the Sites list.
What happens next
Section titled “What happens next”The What happens next panel lists what Scanfully does once a site is added, whichever way you added it:
- Uptime checks are scheduled: an uptime check every minute.
- The other checks are scheduled: performance every 15 minutes, DNS every 30 minutes, the certificate every 6 hours, and broken links and media every week.
- Which notifications cover the site: the notifications that alert about every site cover the new one straight away. Notifications that choose sites by client or label cover it once you give it that client or label. If no notification covers new sites, the panel warns you and offers New notification. See Notifications.
- The first scans are queued: performance, broken links and broken media are queued straight away. Follow them in Jobs & runs.
- With the plugin, WordPress data follows: once the plugin is connected, it sends the site health report, the installed plugins (which Scanfully checks for known vulnerabilities) and WordPress activity.
When you cannot add a site
Section titled “When you cannot add a site”- You’ve reached your site limit: a trial account monitors one site. Click Upgrade to Pro to add more.
- Monitoring is paused: a payment is overdue. Click Go to billing and pay it to add sites again.
- After a trial has ended, Scanfully schedules no checks for new sites until you upgrade.
If adding the site changes what you pay, Scanfully shows the charge and asks you to confirm it before the site is added. See Billing.