
WooCommerce settings
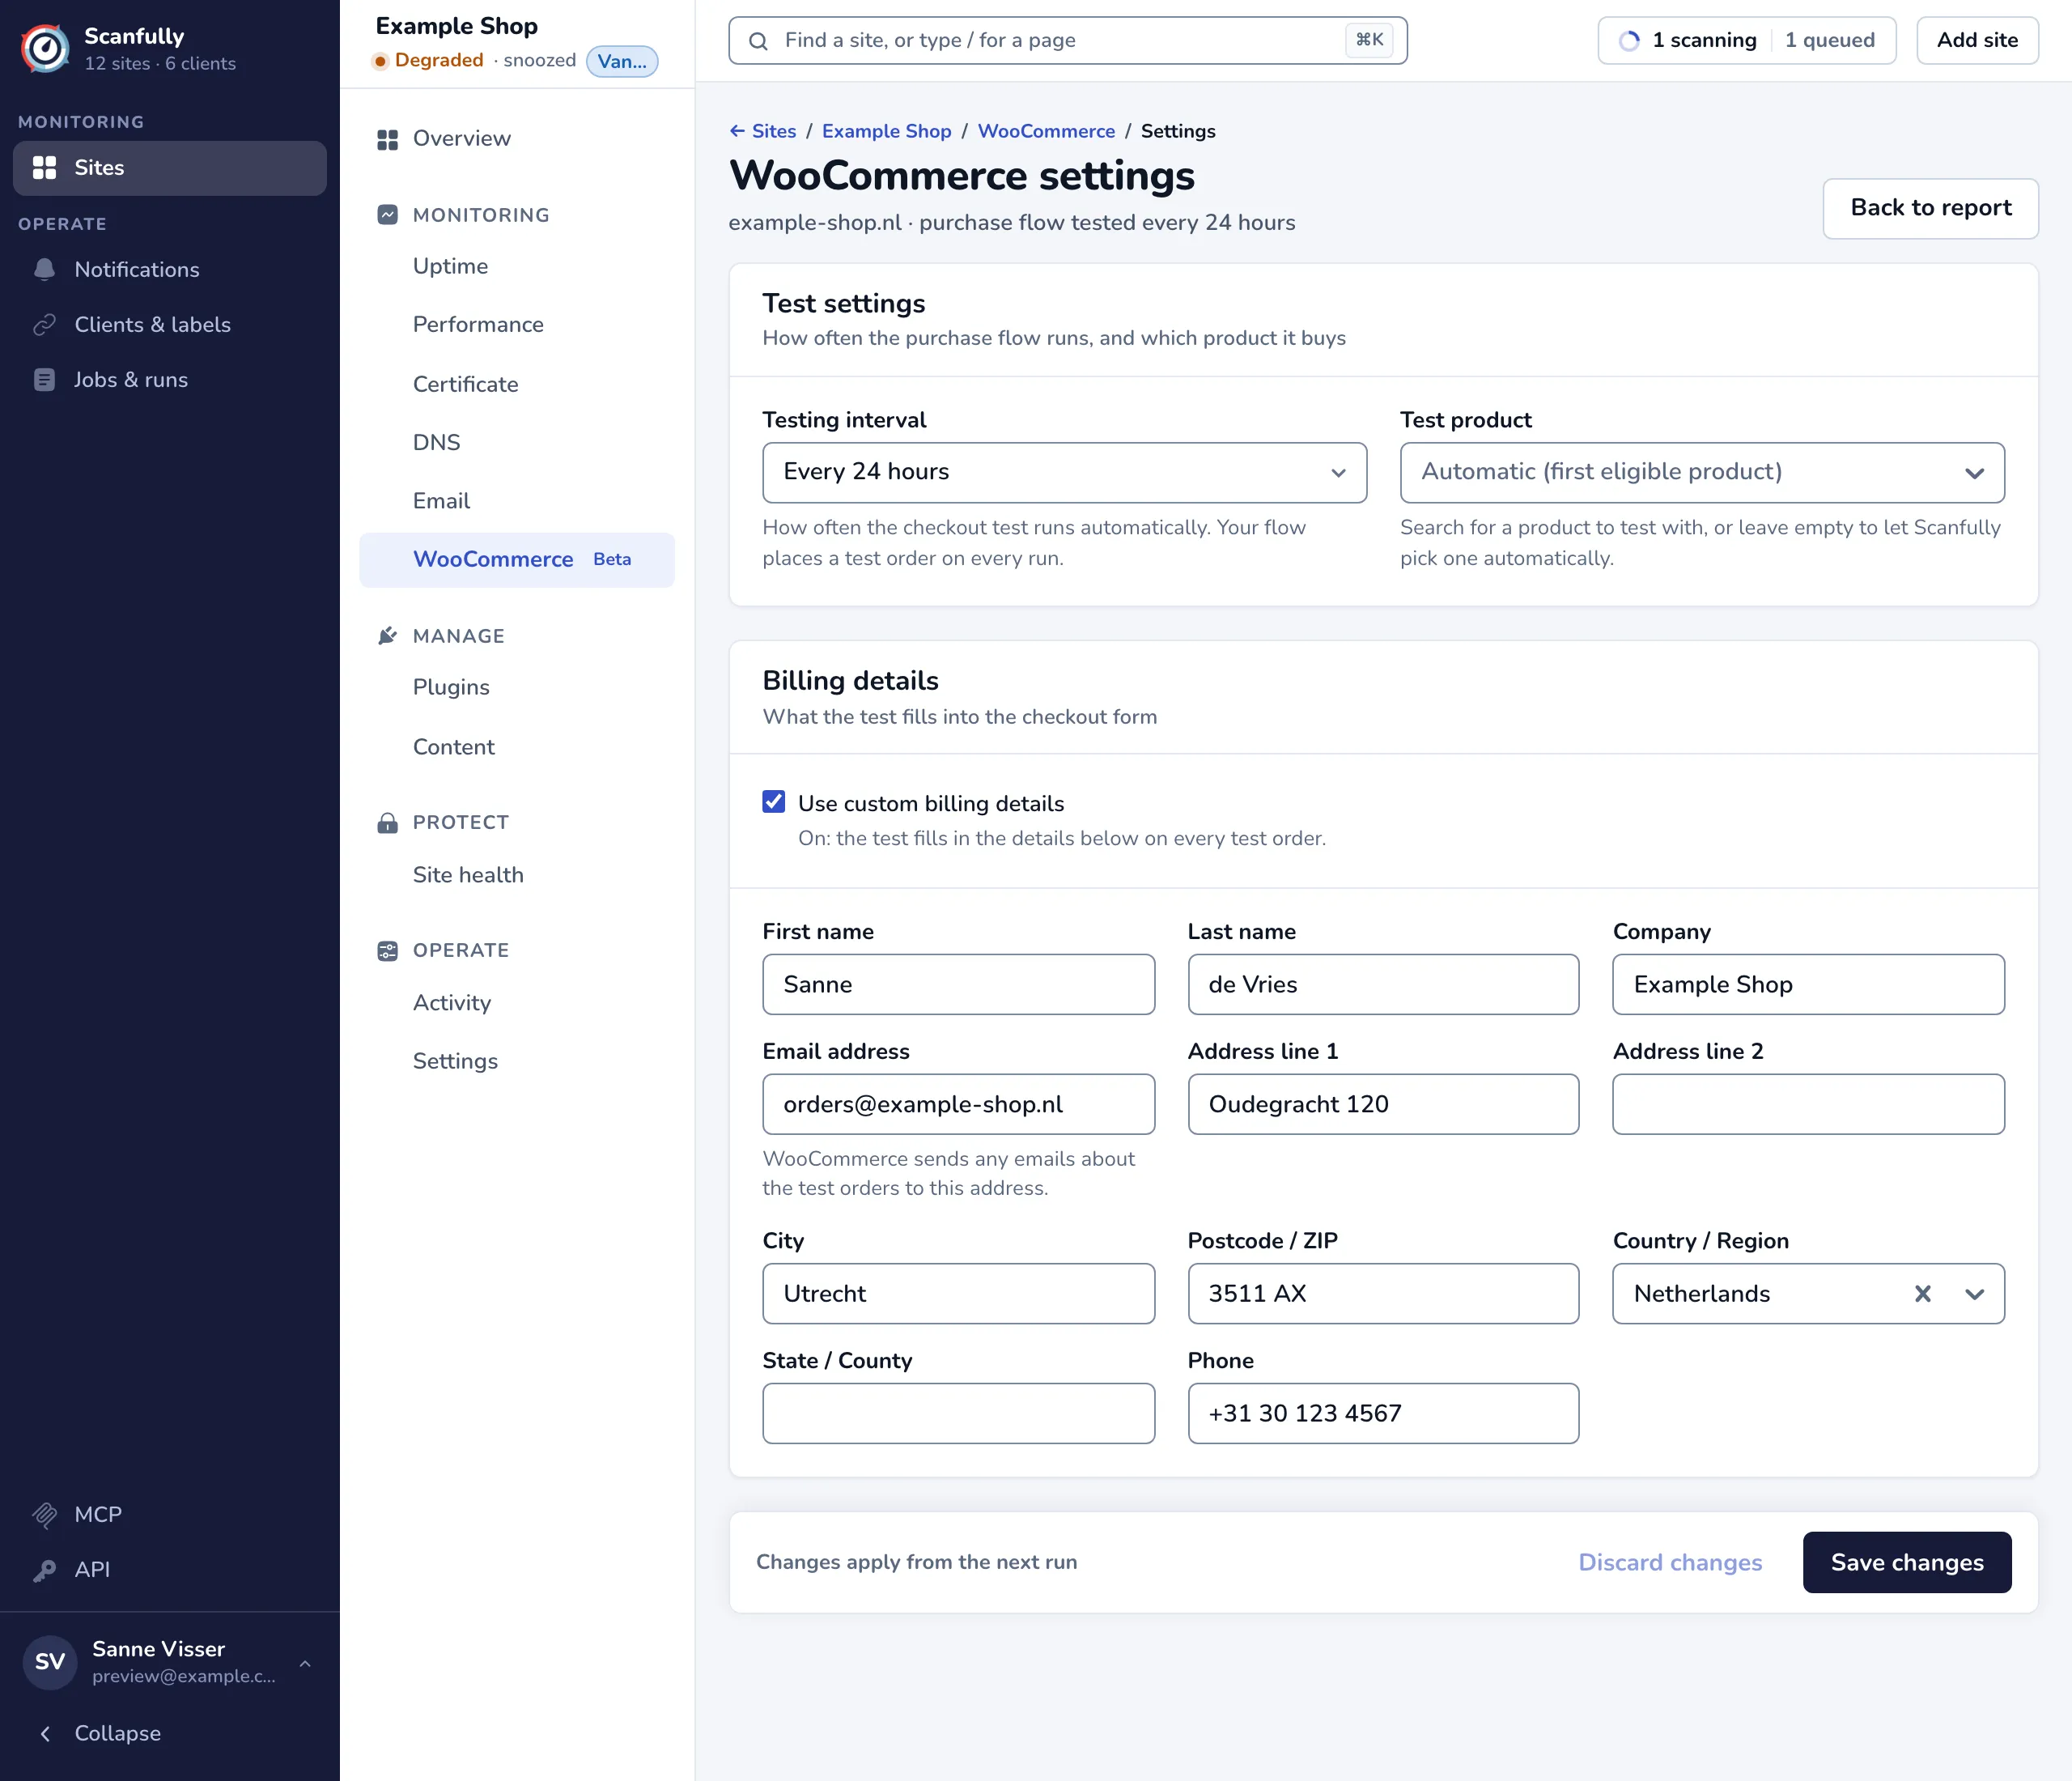
The WooCommerce settings decide how often the checkout test runs, which product it buys and what it fills into the checkout form. The steps the test follows are set in the purchase flow.
To open them, choose WooCommerce in the site menu and click WooCommerce settings. Back to report takes you back to the WooCommerce screen. WooCommerce monitoring is in beta.
Test settings
Section titled “Test settings”- Testing interval: how often the checkout test runs automatically: Every hour, Every 6 hours, Every 24 hours or Manual only. With Manual only, tests only run when you click Test now. When your flow places a test order, it does so on every run.
- Test product: search for a product to test with, or leave it on Automatic (first eligible product) to let Scanfully pick one. The help text shows which product the automatic choice currently resolves to.
Billing details
Section titled “Billing details”The test fills these details into the checkout form.
- With Use custom billing details off, Scanfully uses your shop’s own store address from WooCommerce as the billing address. The fields can’t be edited then, and show the store address as placeholder text.
- With it on, the test fills in the details you enter on every test order: First name, Last name, Company, Email address, Address line 1, Address line 2, City, Postcode / ZIP, Country / Region, State / County and Phone.
WooCommerce sends any emails about the test orders to the Email address, so use an address you control.
If your shop has no usable store address, a warning says so. Complete the store address in WooCommerce, or turn on custom billing details here; without either, the test can’t run.
Save your changes
Section titled “Save your changes”The bar at the bottom counts your unsaved changes. Click Save changes to save them, or Discard changes to go back to the saved settings. Changes apply from the next run.