
Set up the WooCommerce purchase flow
Not every shop follows the standard product page, cart, checkout path. The purchase flow tells Scanfully how your shop works, so the checkout test follows the same route your customers do. Checkout tests can’t run until a flow is saved.
WooCommerce monitoring is in beta; see WooCommerce for how to get it.
Open the wizard
Section titled “Open the wizard”- Open the site and choose WooCommerce in the site menu.
- In the Purchase flow panel, click Configure flow (before a flow is set up) or Change flow.
The Purchase flow wizard has five steps, shown as tabs: Suggestion, Adding a product, Cart, Checkout and Review & test. Use Next and Back to move between them. You can set up and test the flow before you turn on WooCommerce monitoring.
1. Suggestion
Section titled “1. Suggestion”Based on what the Scanfully plugin sees on your shop, the wizard suggests where to start, for example when your shop has no cart page, redirects to the cart after adding a product, or sells a single product. Under Start from, pick the template closest to your shop; you can adjust every step afterwards.
- Use our suggestion: start from what the plugin detected on this shop.
- Standard WooCommerce: product page, cart, then checkout.
- No product page (link): a link such as
/cart/?add-to-cart=123puts the product in the cart. - No product page (form): a form submit to a specific address adds the product.
- No cart page: adding a product sends customers straight to checkout.
- Checkout only: opening checkout already fills the cart, so there is no add-to-cart step.
- Never place an order: check the form and order summary, but don’t create an order.
2. Adding a product
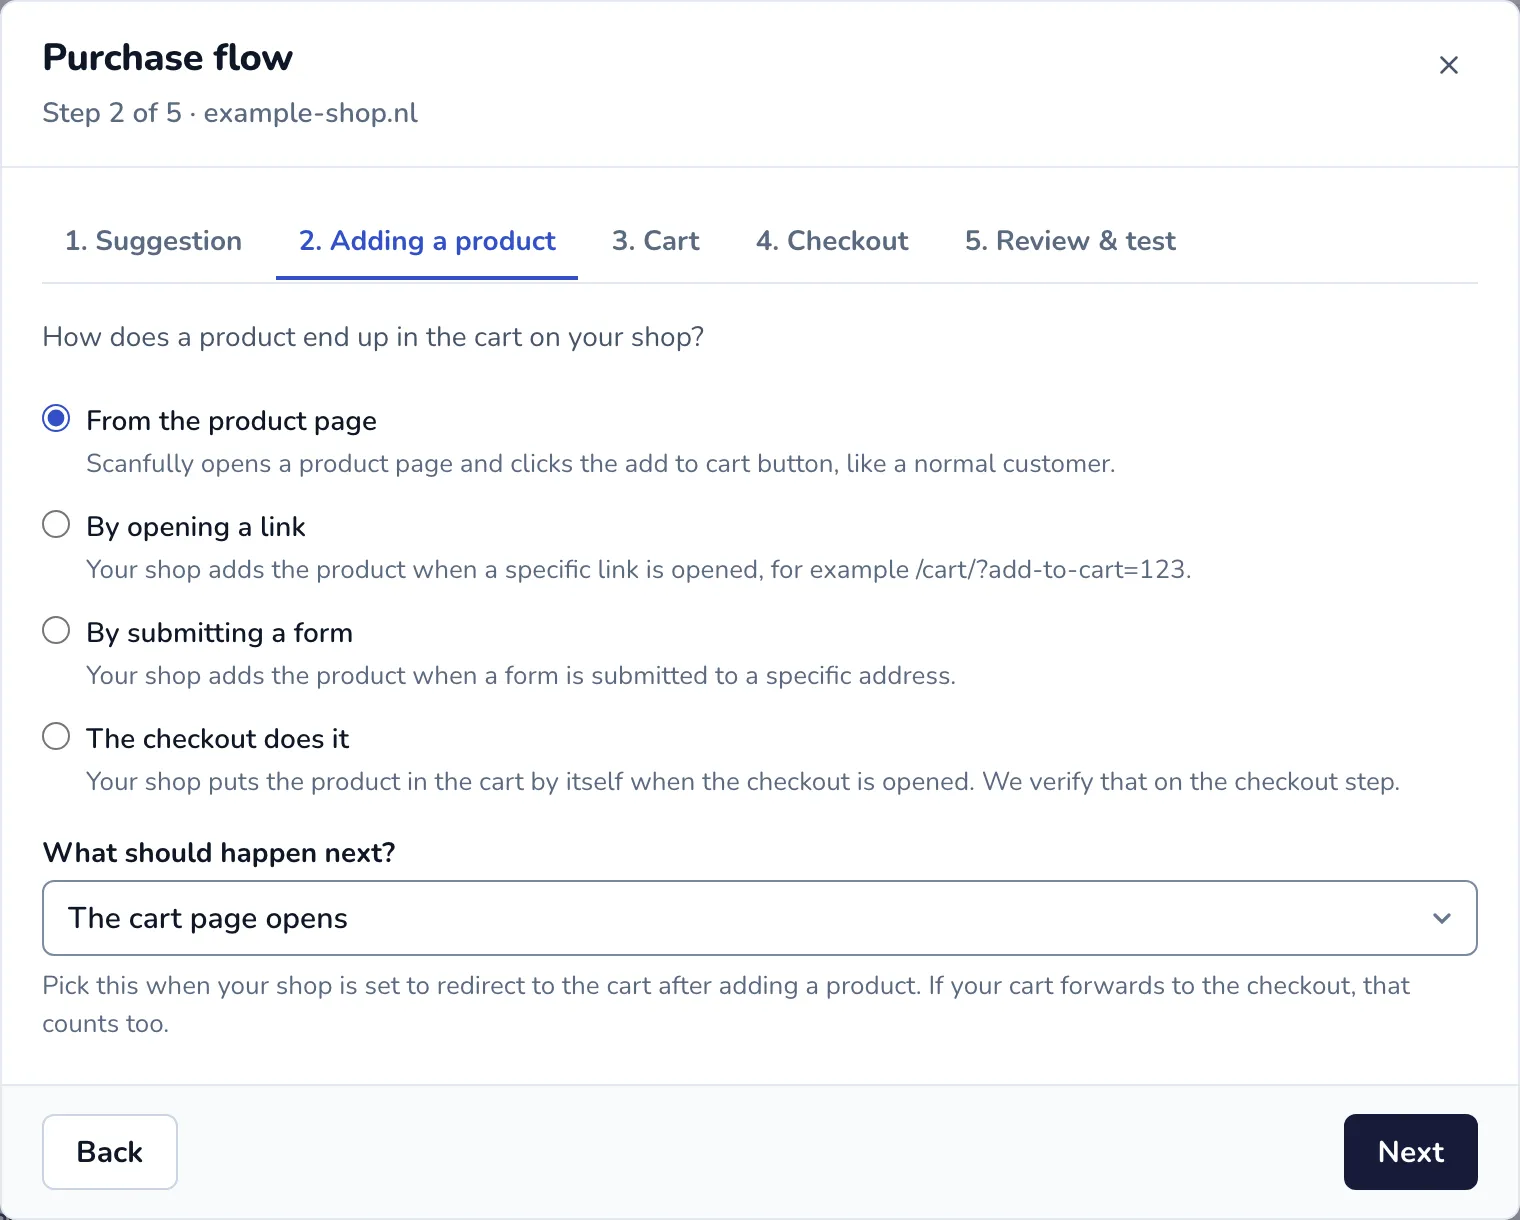
Section titled “2. Adding a product”Choose how a product ends up in the cart on your shop:
- From the product page: Scanfully opens a product page and clicks the add to cart button, like a normal customer.
- By opening a link: your shop adds the product when a specific link is opened. Enter it under Address, or pick a product and the wizard builds the link for you.
- By submitting a form: your shop adds the product when a form is submitted to a specific address. Enter the Address and the Form fields your shop expects (for example
add-to-cartwith your product ID). - The checkout does it: your shop puts the product in the cart by itself when the checkout is opened. This is verified on the checkout step.
Under What should happen next?, choose what the shop does after adding the product: A confirmation appears on the same page, The cart page opens, The checkout opens, or Anything, as long as there is no error (the most forgiving option).
Addresses must be full addresses on your own domain, starting with https://.
3. Cart
Section titled “3. Cart”Choose what Scanfully checks on your cart page:
- Full check: products, a total and a working checkout button must all be present.
- Basic check: only checks the cart is not empty and shows no error. Use this if your cart page is heavily customized.
- Check the redirect to checkout: for shops without a cart page. Opening the cart address must send customers to the checkout.
- Skip this step: the cart is not checked at all.
Cart address (optional): leave it empty to use the cart address your shop reports. When your shop adds the product on the checkout, the cart step is skipped.
4. Checkout
Section titled “4. Checkout”Choose how far the checkout test goes:
- Place a test order: the complete test. It fills in the form and places an order that stops at the payment step. This is the only way to know your checkout truly works.
- Check without ordering: fills in the form and verifies the order summary and payment methods, but never creates an order.
Then, where they apply:
- The checkout fills the cart itself: verify that a product is already in the order summary when the checkout opens. This is always on when there is no add-to-cart step.
- Product options on the checkout: turn this on if customers choose a size, colour or other variation on the checkout page itself.
- Extra checkboxes: terms, EU VAT location confirmation, Germanized legal boxes and a privacy policy checkbox are ticked automatically when they appear. Use Add checkbox for any other box your checkout requires, matched by CSS selector or by Label text (one of the two, not both). Each box can be marked Required.
- Checkout address (optional): leave it empty to use the checkout address your shop reports. This can be your home page if your checkout lives there.
5. Review & test
Section titled “5. Review & test”The last step shows the route Scanfully will follow. Click Test now to run it before you save; the wizard shows each phase as it runs, such as opening the page, adding the product, filling in billing details and placing the order. Test runs from the wizard are limited to 3 every 15 minutes.
Click Save flow to save it. Scheduled tests use the saved flow from the next run.
Test orders
Section titled “Test orders”When the flow places a test order, the test stops at the payment step, so nothing is paid. The Scanfully plugin cancels each test order when the check ends and deletes it later. WooCommerce sends any emails about the test orders to the email address in the billing details, which you set in the WooCommerce settings.